In this tutorial, we will show you how to install MongoDB on Windows.
NoteThe MongoDB does not require installation, just download and extracts the zip file, configure the data directory and start it with command “mongod“.
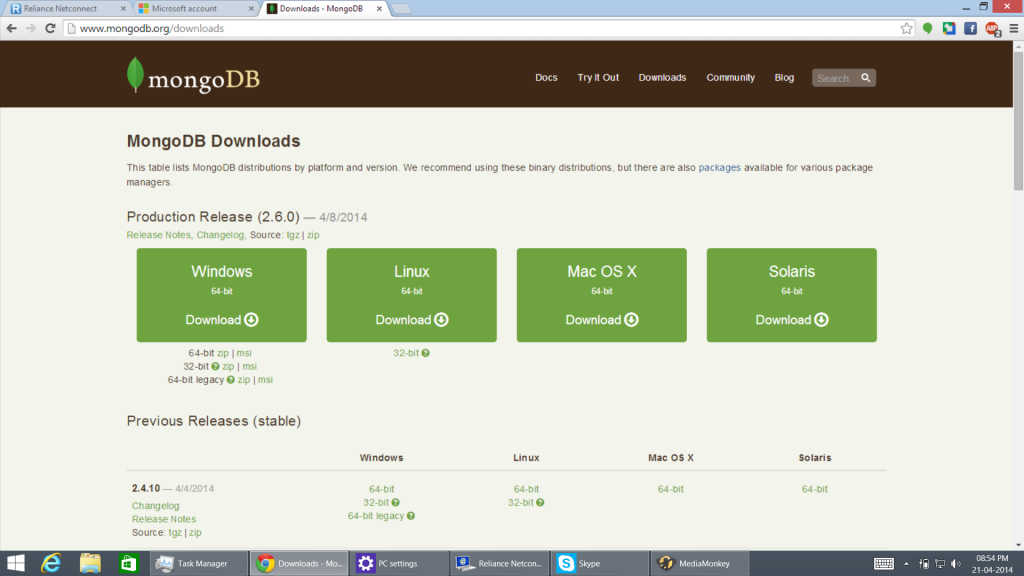
1. Download MongoDB
Download MongoDB from official MongoDB website. Choose Zip package for Windows 32 bits or 64 bits. Unzip, extracts to your prefered location, for example : d:\mongodb\.
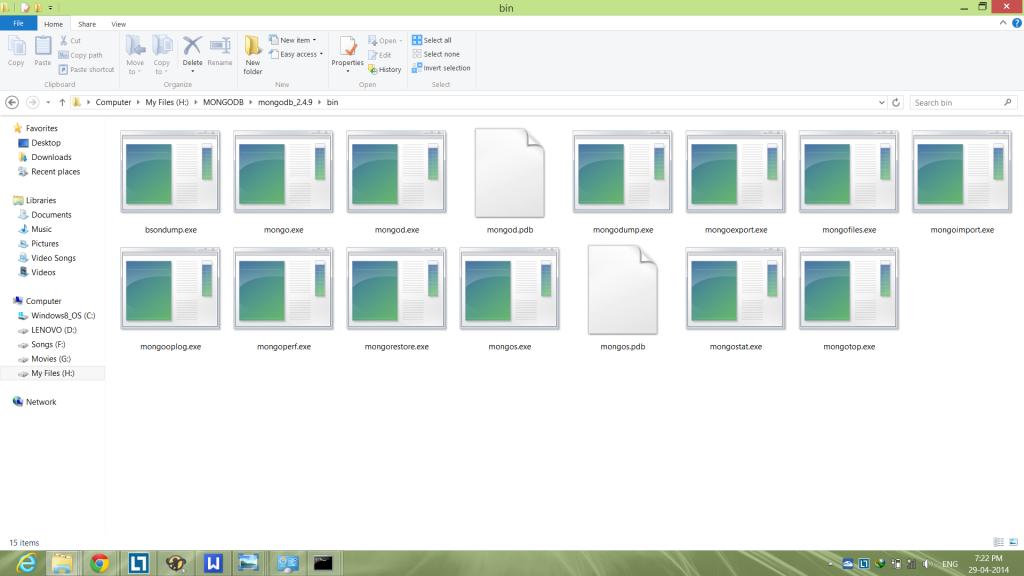
2. Review MongoDB folder
In MongoDB, it contains only 15 executable files (exe) in the bin folder.Check if the files are intact.
3. Set Path for MongoDB
Go to Control Panel -> System -> Advanced System Settings -> Environmental Variables -> (in system variables) Path -> Edit and Copy paste your path in which you have extracted MongoDB.
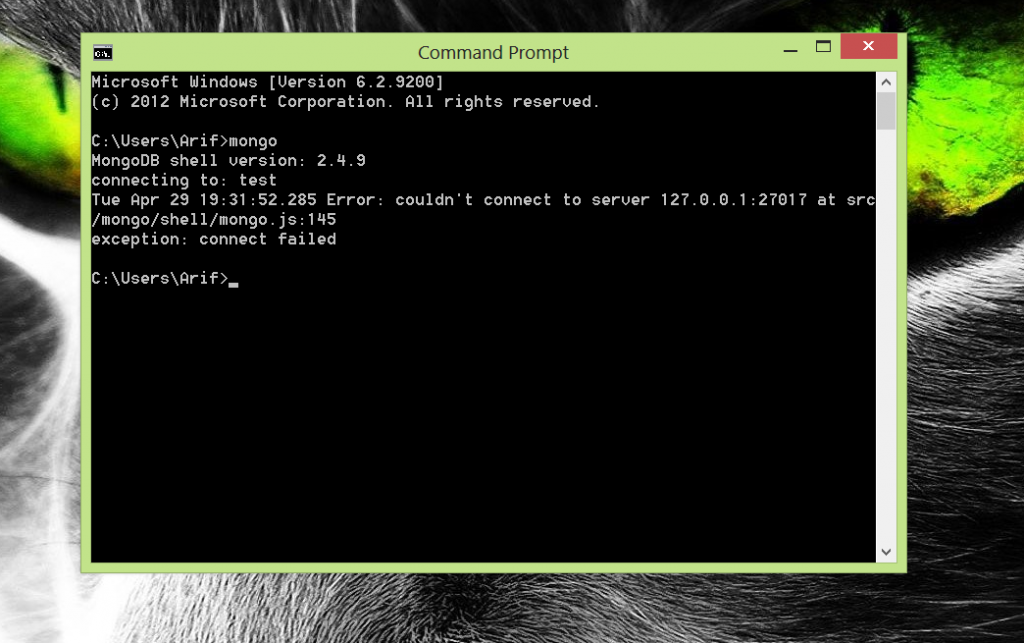
4. Check for MongoDB version
Open Command Prompt and Run “mongo” if u get shell version, You have configured path successfully. If u get unknown command error, go and set path correctly.
4. Create Data Directory
NoteMongoDB need a folder (data directory) to store its data. By default, it will store in “C:\data\db“, create this folder manually. MongoDB won’t create it for you. You can also specify an alternate data directory with --dbpath option.
To create data folder in default directory, run the following command
“C:”
“mkdir \data\db”
--OR--
Head over to the your desired place and create data folder there
And run “mongod.exe --dbpath H:\MongoDB\mongodb_2.4.9\data\db”
The Windows Firewall ask for MongoDB connection, Allow it.
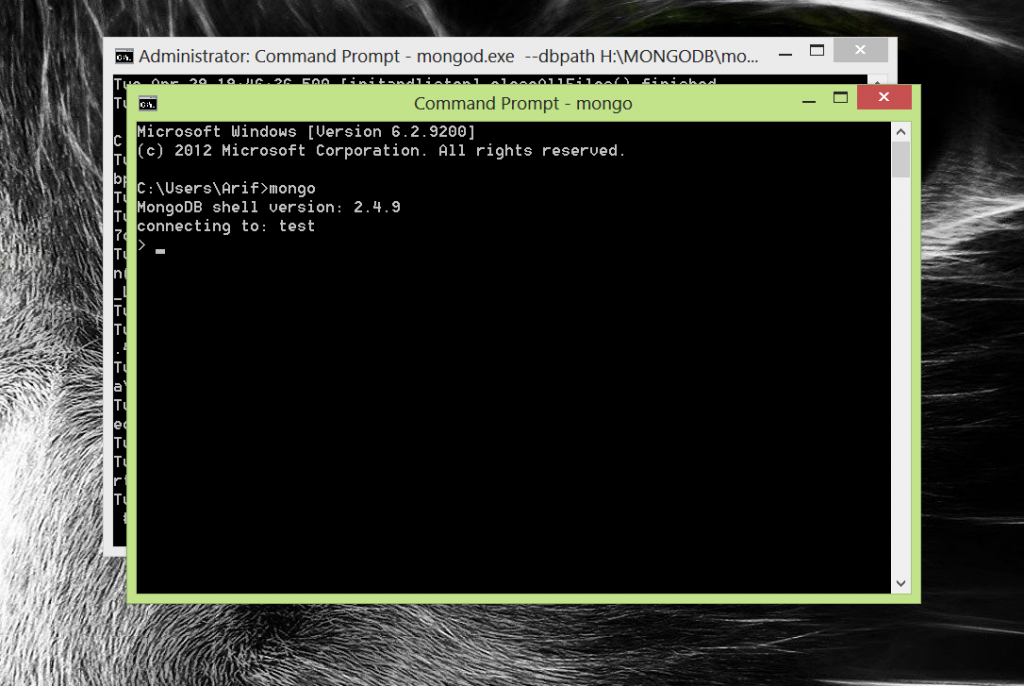
5. Run MongoDB server
Use “mongod.exe --dbpath H:\MongoDB\mongodb_2.4.9\data\db”to start MongoDB server in separate Command Prompt.
6. Connect to MongoDB
Use mongo.exe to connect to the started MongoDB server in a new Command Prompt.
APACHE MAVEN
Apache Maven is not require to install on Windows as a service component, you just need to download the Maven’s zip file, extract it and configure the Windows environment path variable.
Tools Used :
1 JDK 1.6
2 Maven 2.2.1
3 Windows 7
P.S This works with Maven 3 also.
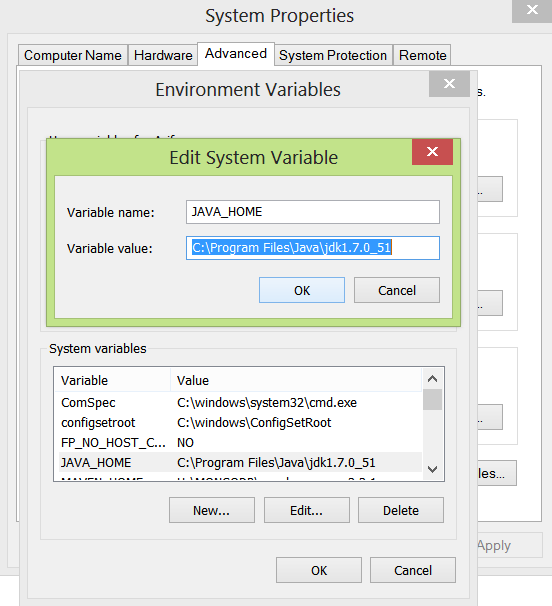
1. JDK and JAVA_HOME
Make sure JDK is installed, and “JAVA_HOME” variable is added in Windows environment variable, and point to the JDK folder.
2. Download Apache Maven
Visit this Maven official website, choose a version and click on the download link, e.g apache-maven-2.2.1-bin.zip.
3. Extract It
Extract the downloaded zip file. In this case, we extracted to d driver and renamed the folder, e.g D:\maven.
Note
That's all, just folders and files, installation is NOT required on Windows.
That's all, just folders and files, installation is NOT required on Windows.
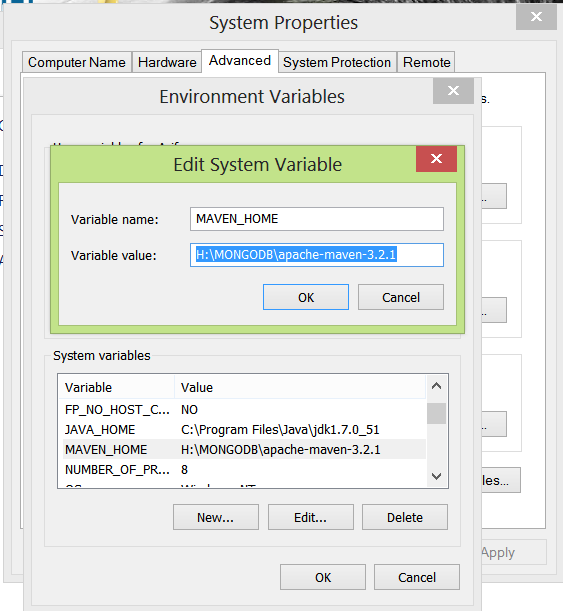
4. Add MAVEN_HOME
Add a new MAVEN_HOME variable to the Windows environment, and point it to your Maven folder.
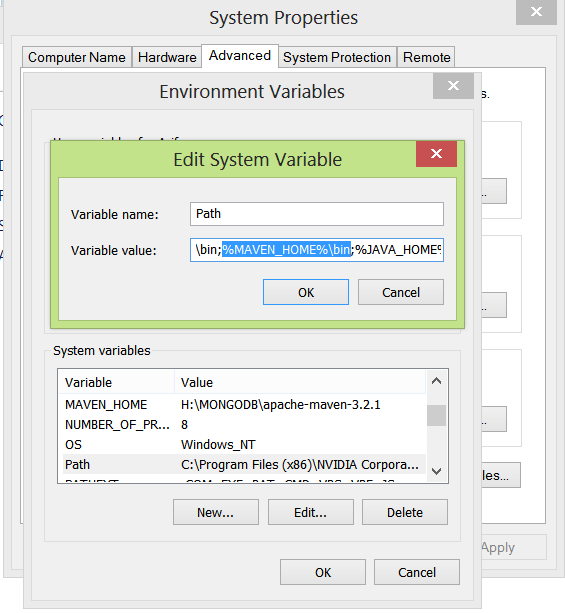
5. Add PATH
Update PATH variable, append “Maven bin folder” path, so that you can run the Maven’s command everywhere.
6. Verification
Done, to verify it, in command prompt, type “mvn –version“.
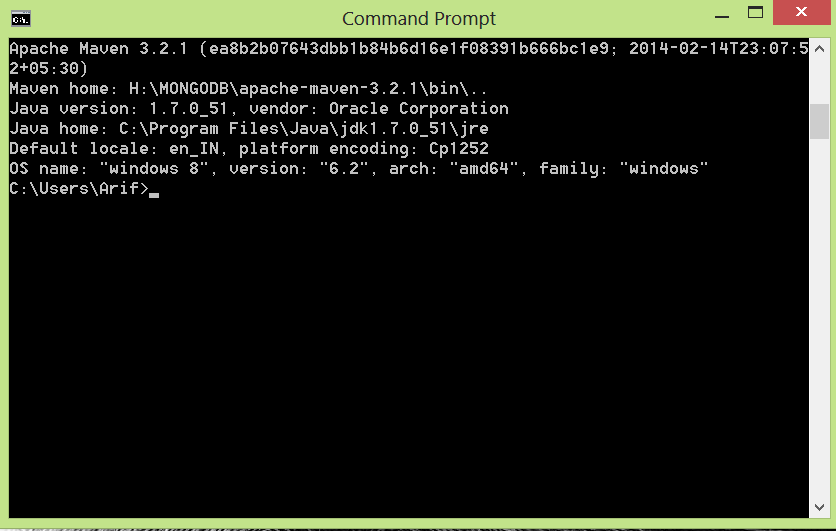
If you see similar message, means your Apache Maven is installed successfully on Windows.
Thanks Arif .....Your information about installation of mongodb was very useful
ReplyDelete